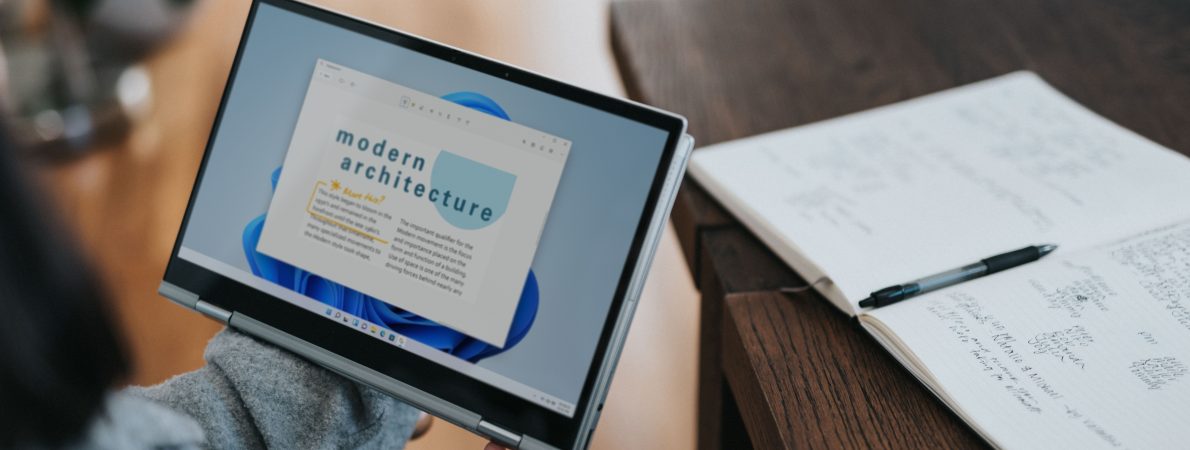
Computers are a vital tool when it comes to getting the most out of your education. As a blind or partially sighted student, knowing what accessibility features are at your disposal and how to use them can super-charge your learning. For a refresher on how computers can help you during your studies and what some of the common accessibility features are, check out the homepage for this guide.
Microsoft’s Windows operating system is the most widely used platform for desktop and laptop computers. Its likely your school, college or university will be using it. Windows is also very popular in homes, offices and workplaces around the world. So, it’s a smart idea to know your way around a Windows computer and how to use its built-in accessibility options.
The good news is, Windows has a great range of built-in accessibility features for you to explore! Trying out new tools and features can be challenging at first. But its always worth persevering, giving yourself a chance to learn them and get used to how they work. Give them a try, you might wonder how you managed without them!
Let’s take a look at what accessibility features are available on Windows and how you can get started with them right now!
Jump to: screen reading, magnification, colours and contrast, screen resolution and text size.
How to Find Accessibility Settings on Windows Computers
On a Windows computer, it’s easy to get started with accessibility features. Just go to the Settings app. Type in ‘settings’ in the Windows search bar for a quick way to get there.
On Windows 11, the settings app is laid out in a two-column view, with main options appearing in a vertical list down the left-hand side. From this list, simply click the ‘Accessibility’ button and you should be good to go. On Windows 10, you can reach the accessibility settings by clicking on the large button labelled ‘Ease of access’ which should appear on the main page of the settings app. Search for ‘ease of access’ in the Windows search bar for a shortcut.
Top tip – built-in accessibility features work anywhere, even the login screen!
If you’re on a shared computer, such as those found at your school or university, don’t worry! It’s easy to get to all the accessibility settings you need from the Windows login screen. Simply click on the accessibility icon (a picture of a stick-person or a wheelchair). If you are unable or struggle to see the screen, the keyboard shortcuts for activating the accessibility features like Narrator and Magnifier will come in very handy.
Top tip – learn keyboard shortcuts
Learn as many keyboard shortcuts as you can! It will make a massive impact on how fast and efficiently you interact with and navigate your Windows PC. You can access some of the most important accessibility features using a keyboard shortcut. This means you don’t have to enter any menus to activate them, and can quickly perform actions like copy and paste. It’s a smart move to learn the shortcuts relating to word processing and working with text. These all add up to a major boost to your productivity! Check out this list of useful keyboard shortcuts on Windows to get started!
Narrator – Screen Reader
On Windows, the built-in screen reader is called Narrator. If you are unable or struggle to see what is displayed on a computer’s screen, using Narrator could transform the way you interact with your computer, enabling you to use it without having to see what’s on the screen. As you move around the content and user interface using the keyboard, Narrator will read out what you are focusing on.
To turn Narrator on and off, use the keyboard shortcut (ctrl + Windows key + Enter). One of the handy things about Narrator is you can also use it during Windows setup and Login screens. This could definitely make life a lot easier!
Top tip – try NVDA
If you find Narrator useful, but want something with more features, NVDA could be what you’re looking for! NVDA is a powerful but free screen reader you can install on your computer, providing a wider range of features. It’s quite easy to get started with, thanks to some great online learning resources published by the American Foundation for the Blind. Why not give NVDA a go!
Top tip – connect a braille display
Did you know you can connect your braille display to Narrator? This allows you to have Narrator’s spoken output delivered to your braille display, so you don’t have to listen to the screen reader. It’s easy to get started, simply follow Microsoft’s guide and check their list of compatible braille displays.
Magnifier
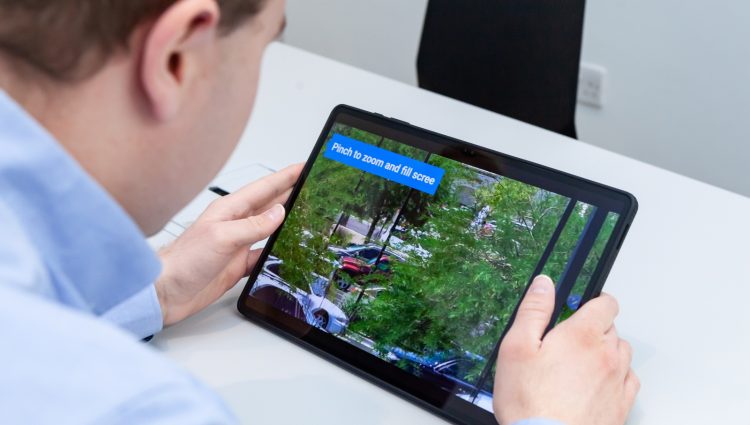
If you want to make content on your screen bigger, the built-in ‘Magnifier’ app is here to help. It allows you to zoom in and out, magnify part or all of the screen, move around with the magnification following your mouse pointer or cursor and even has basic read aloud features.
You can quickly activate this app by using the keyboard shortcut (Windows key and ‘+’), or by searching for ‘magnifier’ on the Windows search bar.
Magnification can be disorientating when you first use it. But don’t worry, once you’ve learnt how it works and have got comfortable, it can make using your computer easier! Try starting with low levels of zoom and gradually increase it until you find the right level and have a play around with the different options.
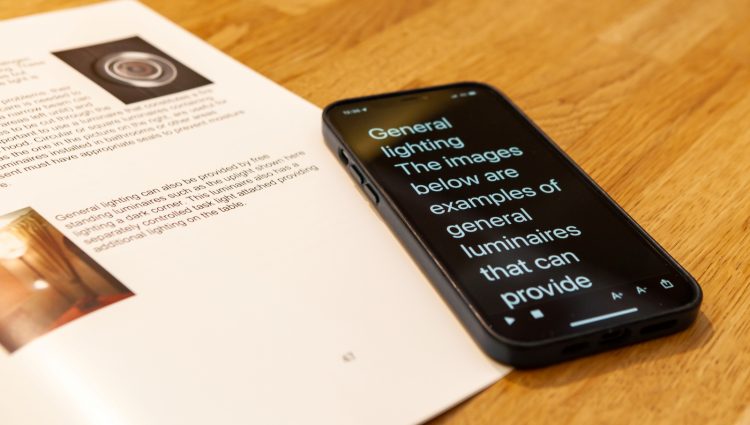
Top tip – use Magnifier to read text (selective screen reading)
Sometimes all you want is for some content to be read out to you, rather than having to read everything yourself. But if you don’t want to use a full screen reader, you can use a feature called selective screen reading instead. On Windows, Microsoft have built reading features directly into the Magnifier app. With this feature, you can click on any text on your PC and have the computer read it aloud to you. Magnifier allows you to do this whilst you’re zoomed in, but you can zoom out and just use the reading features if you prefer. Why not take it for a test drive, it could be just what you need!
Colours and Contrast
Changing the way colours are displayed on your computer could make a big difference. By default, most content on your computer’s screen will be displayed as dark text on a light background. This might not be a colour combination that works for you, causing eye strain or glare. Sometimes just flipping the colours to light text on a dark background can make the screen much easier to see.
Dark mode
To quickly flip these colours in many apps, you can use ‘Dark mode’. Dark mode is available both on Windows 10 and Windows 11. It is activated in your computer’s personalisation settings and can take effect in most supported apps, including Microsoft Office. If you’re using a shared computer at your school, college or university, you might need to ask the IT support staff to enable this feature for you.
Colour filters and high contrast
Windows has a variety of colour filter options and contrast themes available. You can find these options by searching for ‘colour filters’ and ‘high contrast’ on the Windows search bar.
Try experimenting with the different colour settings and see what works for you!
Top tip – adjustable mouse pointers
On Windows, it’s easy to change how your mouse pointer appears on the screen. By default, the pointer is white. But if that’s hard for you to see then you have plenty of options. You can change both its size and colour to whatever combination works for you. There’s also an inverted mode, which switches the colour of the pointer between black and white, depending on the colour scheme of the app you are in.
If you really want to get creative, you can customise your mouse pointer further, which could get interesting…Check out how to change the mouse pointer in Windows 10 or how to tweak the mouse pointer in Windows 11 to get started!
Screen Resolution and Text Size
Accessibility features such as magnification are great. But what about those times when you wish everything was bigger to start with? Thankfully, on Windows there are two ways you can make the content larger on your screen, without having to use any additional accessibility features.
As Microsoft puts it, you can either ‘Make text bigger’ or ‘Make everything bigger’. These settings can be accessed from the Display settings menu. Making text bigger will adjust the font size used to display text on your computer. It’s important to note that this won’t take effect in every application. So it’s a good idea to check out the apps you use first after applying this setting to find out if this works for you.
If you still want larger content, or making text bigger didn’t work out, you can use the option to ‘Make everything bigger’. You will find a percentage value which is set to 100% by default. Selecting a larger value such as 150% will apply a setting called scaling to your screen and should make content appear larger.
If you need to make further modifications to the size of content on your screen, you can adjust your screen resolution manually. If you do this, the lower the number, the larger text should appear. However, when changing these settings, content might not fit properly on the screen. So it could be a good idea to get some sighted assistance to check you’re getting the desired effect.
Helpful Links
Check out these links for more information about accessibility features on Windows:
Useful Accessories You Could Try
Computers are amazing. But they can be even more powerful when used alongside other accessible pieces of kit. Bone conduction headphones, braille tech, electronic magnifiers and much more can all help to super-charge your studies. Check out our Useful Accessible Accessories for Education page to find out more!
Getting the Best Tech and Support for Your Needs
The technology and features we explore in this guide are a great place to start when it comes to making it easier for you to access your education. But it’s important to bear in mind, these are free tools and it is likely you could benefit from more sophisticated (and more costly) tech, software and equipment. So, it’s vital your school, college or university support you to explore all available options and use the best solutions possible.
There are a number of ways the right technology can be purchased for you which won’t cost you anything. If you are at school or college, speak to your QTVI and other disability staff about funding. If you are studying at university, you can get funding for equipment via Disabled Students’ Allowance (DSA). To learn what types of technology DSA can support, why not check out our helpful guide?
The things you do to access your learning are only one piece of the puzzle. Your school, college or university have an obligation to do everything they can to support you and make your learning experience as accessible as possible. Find out more about the support you can get: The Professionals There to Support You at School; Six Steps for Starting Secondary School; Getting the Right Support in Place at College; The Professionals There to Support You at University.
Need support with accessing your education?
Our Education Information Advice and Guidance Service is here for blind and partially sighted students aged 7+, their families and the professionals that support them. We provide expert information, advice and guidance supporting students to navigate primary, secondary school, college and university.
If you have any questions about accessing your education, please reach out to us by visiting our Education Information, Advice and Guidance Webpage.